How to create and edit Shopify pages
Learn how to easily create and edit Shopify pages to enhance your online store's content and visibility. Start building today!

How to create and edit Shopify pages

Go to Online Store > Pages in your Shopify admin, click Add page, then fill in a title, add your content, set visibility, and hit Save. That’s the whole mechanism behind every Shopify page you’ll ever build.
From there:
- Preview the page before it goes live.
- Add it to your navigation menu so people can actually find it.
- Edit the search engine listing (title, meta description, URL handle).
- Decide if it needs a custom template.
Use a plain Page for static content like About or Contact. Reach for a template or page builder when you need a genuinely different layout, like a campaign landing page.
Key Takeaways
Creating a Shopify page takes minutes, but building pages that rank and convert depends on unique content, correct SEO fields, and the right template for the job.
| Point | Details |
|---|---|
| Start in the right place | Go to Online Store > Pages, click Add page, and fill in title, content, and visibility. |
| Don’t skip the SEO fields | Write a unique page title, meta description, and clean URL handle for every page. |
| Match the tool to the task | Use native Pages for static content, custom templates for unique layouts, and page builders like Shogun or PageFly for frequent landing pages. |
| Test before you publish | Preview on both desktop and mobile, and use draft pages to trial template changes safely. |
| Automate carefully at scale | Tools like Ecom-eye generate unique, SEO-safe pages in bulk, avoiding the duplicate-content risk that comes from copying supplier listings directly. |
Table of Contents
- Where to find Shopify pages in the admin
- How do I create a page in Shopify?
- How do I edit page content properly?
- How does page visibility and SEO affect your store?
- Shopify pages vs templates: what’s the difference?
- How do I assign a custom template to a page?
- Are Shopify page builder apps worth it?
- Can you create and edit pages programmatically?
- When does bulk, SEO-safe page automation make sense?
- What beginners get wrong about Shopify pages
- Publishing pages at scale without the duplicate content risk
- Where to read more
- Sources
- FAQ
Where to find Shopify pages in the admin
Every static page lives under Online Store > Pages. That screen lists every page you’ve created, with columns for title, visibility status, and the date it was published or last edited. A search bar and visibility filter sit at the top, useful once you’ve got more than a dozen pages and can’t remember which one holds your shipping policy.
Click into any page and you’ll see the same layout every time: a title field, a content editor with a toggle between rich text and raw HTML, a template selector in the sidebar, visibility controls, and a search engine listing section near the bottom.
- Title — becomes the page’s H1 by default in most themes.
- Content editor — rich text for most edits, HTML for precise markup.
- Template — assigns a layout beyond the default page template.
- Visibility — toggles the page live or hidden, with optional scheduling.
Always preview before assuming something’s broken. Shopify’s own help documentation on creating and editing pages notes that browser caching can delay changes appearing in your preview, so a hard refresh often fixes what looks like a saving error.
How do I create a page in Shopify?
Here’s the sequence, start to finish:
- Go to Online Store > Pages and click Add page.
- Write a descriptive title. “Returns & Exchanges” beats “Policy 2” every time, both for customers and for search engines.
- Add your content using the rich text editor. Switch to the <> HTML view if you need specific formatting, embedded code, or a Google Map.
- Insert images where useful, and give each one proper alt text.
- Set visibility. Choose “Visible” to publish now, or schedule a future date if you’re prepping content ahead of a launch.
- Assign a template if the page needs a non-standard layout (more on that shortly).
- Save.
- Preview the live page and check it on both desktop and mobile.
Before you publish, run through a short checklist: has the SEO snippet been written, does the page have a link somewhere in your navigation or footer, and if it’s a contact page, are the actual contact details correct and clickable? It sounds obvious, but proofing a contact page for a working phone number is the kind of thing that gets skipped in a rush.
Pro Tip: If you’re creating several similar static pages, like a policy page for each country you ship to, draft one properly first, then duplicate the HTML and swap in the specifics. It’s faster than rebuilding formatting from scratch each time, and it keeps your heading structure consistent across pages.
For anyone managing a growing catalogue, the same logic that keeps product page structure consistent applies to static content too. Consistency saves time and looks more professional to a visitor jumping between pages.
How do I edit page content properly?
The rich text editor handles most of what most stores need, including headings, paragraphs, bold and italic text, bullet lists, and basic image placement. Switch to the HTML editor when you need something the rich text toolbar can’t do, custom div structures, embedded video, or a Google Map iframe.
To embed a map, generate the embed code from Google Maps, switch your page to HTML view, and paste the iframe snippet directly into the content field. Shopify renders it exactly as supplied, so double check the map is centred correctly before saving.
A few things worth doing properly every time:
- Add descriptive alt text to every image, not just “image1.jpg”. Something like “Team packing orders in the Bristol warehouse” helps both accessibility tools and image search.
- Keep your heading hierarchy sensible. One H1 (the page title), then H2s and H3s in logical order, not a wall of bold text pretending to be headings.
- Check links open correctly, especially anything pointing to external sites or PDFs.
- If a change doesn’t show up on the live page, clear your cache or open the page in a private browser window before assuming something’s gone wrong.
Pro Tip: Write alt text as if you’re describing the image to someone on the phone. “Blue ceramic mug on wooden table” beats “product photo” every time, and it doubles as a small SEO signal.
How does page visibility and SEO affect your store?
Every page has three visibility states worth understanding: visible now, hidden, and scheduled for a future date. You’ll find the toggle right on the page editor, and if you’re managing a large batch of pages, Shopify lets you select several from the Pages list and change their visibility in bulk rather than opening each one individually.
The search engine listing section is where a lot of the real SEO work happens, and it’s tucked lower on the page than most people expect:
- Page title — this is what shows as the blue link in Google’s results. Keep it specific and under roughly 60 characters.
- Meta description — the summary text under the title in search results. Write one per page; don’t leave it blank and don’t copy it across pages.
- URL handle — short and readable beats long and stuffed with keywords.
/pages/returnsreads better than/pages/returns-policy-and-exchange-information-page.
Quick SEO checklist for static pages: unique title and meta description on every page, one clear H1, a logical heading structure underneath it, at least one internal link to a related page, alt text on every image, and no duplicated blocks of text copied from another page on your own site.
Avoid thin content. A page with two sentences and a stock photo won’t rank for much, and duplicate boilerplate across multiple pages can quietly work against your entire site’s visibility. Good Shopify page layouts tend to have enough genuine, specific content to earn their place in search results, not just fill space.
Shopify pages vs templates: what’s the difference?
A Page is a static content resource, your About, Contact, FAQ, or Shipping Policy. It holds text and media but doesn’t control its own layout beyond what your theme’s default page template provides.
A template is a theme file that controls how content is arranged and styled. Section-based themes built on Online Store 2.0 let you build a template out of interchangeable content blocks, so you can create a custom landing page layout without writing new Liquid code from scratch.
Use each one for what it’s actually good at:
- Pages for long-term static content that rarely changes: policies, About Us, FAQs.
- Custom templates for pages that need a distinct visual structure, like a seasonal campaign landing page with a hero banner and testimonial grid.
- Sections for reusable blocks you want to drop into multiple templates, like a newsletter signup or a trust-badge row.
The limitation of a plain Page is that it inherits whatever your theme’s default page template looks like. If you need something visually different, a custom template or a dedicated page builder becomes the better route, not the default Page editor.
How do I assign a custom template to a page?
Every page editor has a Template dropdown in the sidebar. By default it’s set to the theme’s standard page template, but you can assign a custom one once it exists.
- In your theme editor (or code editor for older themes), create a new template file with a suffix, for example
page.landing.jsonfor a page template named “landing”. - Open the page you want to change in Online Store > Pages, and select the new template from the dropdown. Shopify’s GraphQL Page object refers to this as the
templateSuffixfield. - Save, then preview on both desktop and mobile before publishing.
- If anything looks broken, missing sections or a Liquid error, check the template file first rather than the page content itself.
Pro Tip: Build and test new templates on an unpublished draft page first. That way you can catch layout issues or broken sections without a half-finished design sitting live on your storefront.
Common pitfalls: assigning a template that references a section your theme doesn’t actually have, or forgetting that a template swap can change the page’s URL structure in older themes. Test thoroughly before pointing navigation links at it.
Are Shopify page builder apps worth it?
Shopify’s native editor handles static content well, but it has real limits on layout flexibility. Third-party page builders fill that gap with drag-and-drop sections, reusable snippets, and sometimes built-in A/B testing, at the cost of a monthly fee and, occasionally, a small performance hit if the app isn’t well optimised.
Three well-known options illustrate the range:
- Shogun offers a visual page editor with reusable content sections and content scheduling built into its tiered pricing, good for teams publishing landing pages regularly.
- PageFly leans into conversion optimisation, with AI-assisted templates, A/B testing, and analytics baked into its editor.
- GemPages offers a similar drag-and-drop approach with a strong template library, popular with stores that want speed over deep customisation.
| Approach | Best for | Trade-off |
|---|---|---|
| Native Shopify Pages | Static, low-maintenance content | Limited layout flexibility |
| Custom theme templates | Unique one-off layouts | Requires some Liquid knowledge |
| Page builder apps | Frequent landing pages, visual editing | Monthly cost, possible performance overhead |
Before subscribing to any builder, check theme compatibility, confirm it exports clean code rather than locking your layout inside the app, and weigh the monthly cost against how often you’ll actually be building new pages.
Can you create and edit pages programmatically?
For developers managing pages at scale, Shopify exposes the Page resource through both REST and GraphQL. The Admin REST API’s Page resource uses endpoints like POST /admin/api/latest/pages.json to create a page and PUT /admin/api/latest/pages/{page_id}.json to update one, with body_html holding the page’s markup.
The GraphQL Admin API’s Page object adds fields like templateSuffix and published status, plus pageCreate and pageUpdate mutations for building or editing pages directly.
- Request the
write_contentscope before attempting to create or update pages via the API. - Sanitise any HTML you’re pushing into
body_html— never trust unescaped user input directly into page markup. - Use pagination parameters when listing large numbers of pages rather than pulling everything in one request.
Pro Tip: If you’re building an integration, test writes against a development store first. A malformed body_html payload can render a page blank on the live theme.
When does bulk, SEO-safe page automation make sense?
Once you’re managing dozens or hundreds of near-identical pages, product listings sourced from a supplier catalogue, or a set of near-duplicate campaign pages, manual creation stops scaling. This is where automation earns its place, provided it’s built to avoid the trap that catches most dropshippers: duplicate content copied straight from a supplier or competitor listing.
Before choosing a tool, check it against a short list:
- Generates genuinely unique content per page, not reworded templates.
- Produces SEO-ready titles and meta descriptions automatically.
- Supports bulk import from supplier sources.
- Offers multi-language output if you’re selling across regions.
- Exports directly to Shopify without manual reformatting.
Stores publishing high volumes of near-duplicate product content face a real risk of duplicate-content penalties and Google Merchant Center disapprovals if the automation doesn’t produce genuinely distinct copy. A well-built bulk page layout strategy can actually strengthen SEO at scale rather than dilute it, but only when uniqueness is treated as a requirement, not an afterthought.
Pro Tip: Before running any bulk import, spot-check five to ten generated pages manually. It takes ten minutes and catches formatting issues before they multiply across your whole catalogue.
What beginners get wrong about Shopify pages
Most mistakes aren’t technical, they’re habits of rushing. Publishing a new page without linking it anywhere in your navigation is the most common one; the page exists, but nobody, including Google, can easily find it. Leaving the meta description blank is a close second.
Test changes on a draft page before pushing them live, especially template swaps. Check your new page on mobile, not just desktop, since spacing issues often only show up on smaller screens. And once a page is live, glance at your organic traffic a couple of weeks later. If a policy page or FAQ suddenly isn’t pulling any search visits, something in the SEO fields probably needs a second look.

Publishing pages at scale without the duplicate content risk
Everything above works well when you’re building a handful of pages by hand. It gets a lot harder once you’re managing hundreds of product listings sourced from AliExpress, Amazon, or a competitor’s Shopify store, and copying that content directly is exactly what triggers Google Merchant Center disapprovals and duplicate-content penalties.
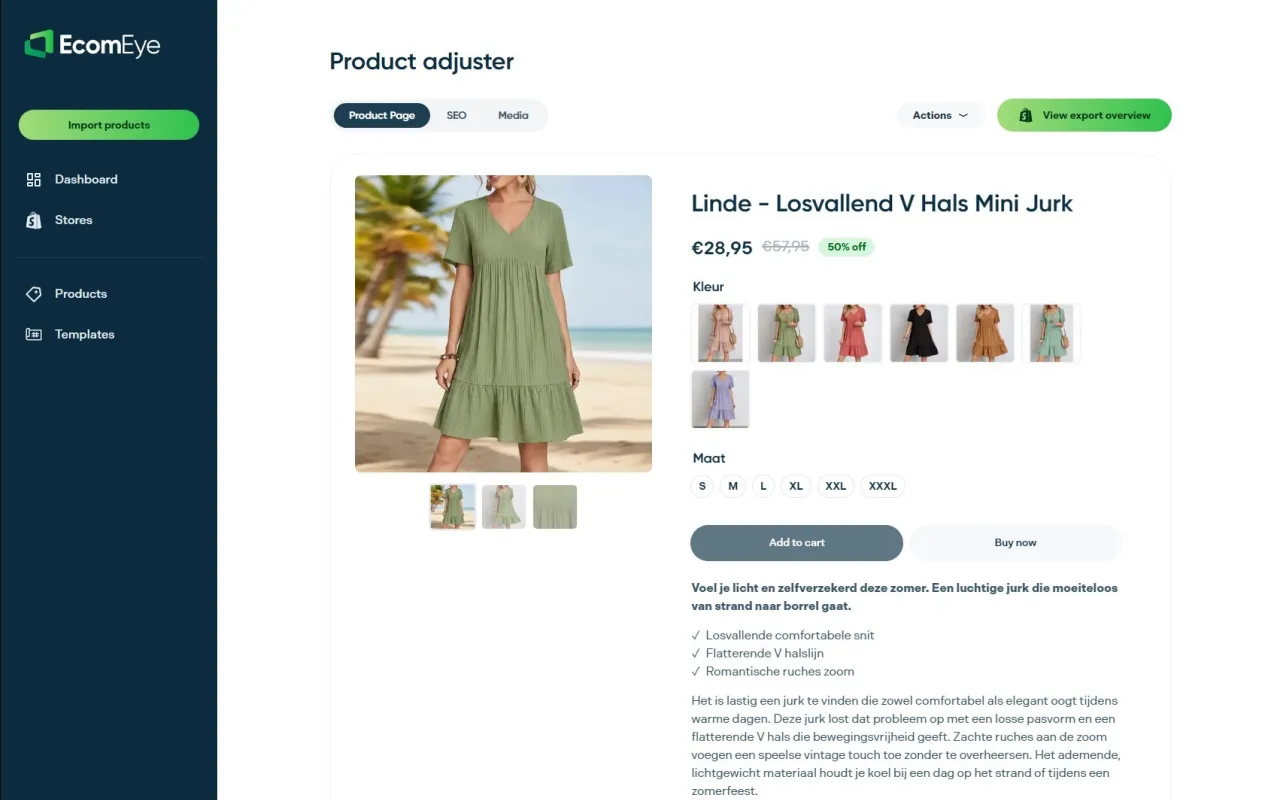
Ecom-eye was built for that exact gap. Import your product catalogue in bulk, and it generates unique titles, clean descriptions, and SEO-ready content per product, along with AI-generated images so you’re not reusing supplier photos everyone else has too. Everything exports to Shopify in one click, no manual reformatting, no rewriting each listing by hand.
If you’re scaling a catalogue and want to see the workflow before committing, start with the AI product description generator to see how bulk content generation and SEO controls work together, or check the AI product image generator if sourcing unique images is your bigger bottleneck.
Where to read more
For deeper technical detail, Shopify’s own resources cover the topic thoroughly:
- Shopify Help Center: Creating and editing pages
- Shopify Dev: Page REST API resource
- Shopify Dev: Page GraphQL object
- Nectar’s Shopify optimisation checklist
Sources
- Shopify Help Center | Creating and editing pages
- Page - GraphQL Admin (Shopify Dev)
- Shogun ‑ Landing Page Builder - Design blog posts, product pages, landing page sections & more | Shopify App Store
FAQ
How do I create pages in Shopify?
Go to Online Store > Pages, click Add page, add a title and content, set visibility, then save. Assign a custom template only if the page needs a layout different from your theme’s default.
Where do I find pages on Shopify?
Pages live under Online Store > Pages in your Shopify admin, listed with their visibility status and last edited date.
Is Shopify still worth it in 2026?
For most merchants building product-based stores, yes. Its native page editor, template system, and app ecosystem, including page builders like Shogun and GemPages, cover everything from a simple About page to a fully custom landing page.
What is the downside of using Shopify?
The native page editor has limited layout flexibility on its own, which pushes many stores toward paid page builder apps or custom Liquid templates for anything beyond static content. At scale, managing many unique product pages also becomes time-consuming without a bulk content tool like Ecom-eye.
Why isn’t my Shopify page showing up correctly?
It’s usually browser caching, so a hard refresh or private browsing window often resolves it. If the layout itself looks wrong, check that the assigned template exists and hasn’t got a missing section or Liquid error.
Ready to boost your product pages?
Generate high-converting, SEO-optimized product pages in bulk using AI automation used by e-commerce experts.
No credit card required