Dropshippers: Safely Replace Supplier Images in Shopify with CSV
A dropshipper's step-by-step guide to replacing supplier images in Shopify. Use Files for singles, CSV overwrite for bulk, or the Admin GraphQL API for...
Dropshippers: Safely Replace Supplier Images in Shopify with CSV
For a single product photo, use Shopify’s Content > Files replace tool. For bulk updates across dozens or hundreds of products, use a CSV import with public HTTPS image URLs and the overwrite option. For ongoing large-scale automation, the Admin GraphQL API handles media at scale. Every method demands one thing: your replacement images must sit at a publicly accessible HTTPS URL before Shopify will touch them. Check your results after import. A tool can handle the whole workflow automatically.
TL;DR:
- Replacing images with a CSV import requires uploading new images to Shopify Files, copying their HTTPS URLs, and matching handle and image columns precisely to avoid misplacement.
- Limit filenames to avoid suffixes like _thumb or _small, and compress oversized images to stay within Shopify’s 25 megapixel maximum for consistent, error-free uploads.
- Using the Admin GraphQL API is suitable for automating large-scale, frequent updates, but developers must validate media IDs and handle errors like MEDIA_DOES_NOT_EXIST.
- Hard-coded theme references to images, such as in Liquid files or custom sections, require direct code edits or switching to dynamic product media to ensure future updates propagate correctly.
- Tools like AI-generated images or plugins can generate unique, SEO-friendly visuals and automate large catalog updates, especially for stores with frequent or extensive image replacements.
Table of Contents
- How do I replace a single supplier image in Shopify?
- How to bulk replace supplier images with a CSV import
- When should you automate with the Admin GraphQL API?
- Should you use an app instead of coding it yourself?
- How do you map images to the right products and variants?
- What size and format should replacement images be?
- How do you verify results and fix import errors?
- Dropshipper checklist and the case for automating this
- How do you back up existing product images before replacing them?
- Does replacing images hurt your Shopify SEO?
- How do you check that a replacement actually shows on the storefront?
- How do you handle images hard-coded into your theme?
- Author perspective: what actually matters when you’re changing images at scale
- Replace supplier photos at scale without the manual grind
- Sources
- FAQ
How do I replace a single supplier image in Shopify?
Go to Content > Files in your Shopify admin, find the supplier image you want gone, and click Replace. Upload your new file and Shopify swaps it in place, keeping the same filename and file record.
Here’s the part that trips people up: Shopify attaches a version token (the ?v=... string at the end of the file URL) every time you replace an image. Shopify-rendered pages request the new version automatically on next load, according to Shopify’s Help Center. But if a theme file or a hard-coded link references that image directly by its old URL, it can keep showing the stale version because it isn’t asking Shopify for the current token.
- Best for a single product, or an image not reused elsewhere in the store
- Fast: no CSV, no coding, done in under a minute
- Check theme sections and blog posts for hard-coded references before assuming the swap worked everywhere
If the same photo appears on twenty product pages, replacing it once through Files updates all twenty, since it’s one file record shared across products.
How to bulk replace supplier images with a CSV import
For anything beyond a handful of products, CSV import is the standard workflow, and it’s genuinely quicker once you’ve done it twice. Start by exporting your existing products so you have the exact handles, SKUs, and current image order to work from. Open that export in Google Sheets or Excel and edit it there rather than building a file from scratch.
The two columns that matter are Product image URL and Variant image URL. Both need a direct, public HTTPS link to the image, because Shopify’s import process downloads and re-uploads each one during the import, according to Shopify’s CSV documentation. The cleanest source for those URLs is your own Shopify Files library: upload your replacement images there first, copy the HTTPS link Shopify generates, and paste it into the CSV.
Follow this sequence:
- Upload all replacement images to Content > Files and copy each public URL.
- Add one row per image, matching each row to its product by handle.
- Paste the correct URL into the Product image URL or Variant image URL column.
- Select Overwrite products with matching handles on import to replace the existing gallery rather than append to it.
- Run the import and check a sample of products immediately afterwards.
Pro Tip: Avoid image filenames ending in _thumb, _small, or _medium. These commonly point to resized crops on supplier sites that either fail Shopify’s size checks or simply don’t exist at the resolution you need.
Keep an eye on Shopify’s image ceiling too: up to 250 images per product and a 25 megapixel size limit, so a raw supplier photo straight off AliExpress can occasionally trip that limit if it’s an unusually large file.
When should you automate with the Admin GraphQL API?
Manual replacement and CSV imports both hit a ceiling once your catalogue runs into the thousands, or once you’re updating images weekly rather than once. That’s when it’s worth building the swap into your own pipeline, whether that’s a feed sync from a supplier or a scheduled job that refreshes photos automatically.
The sequence for developers follows a fixed order:
- Upload the file using
fileCreateorstagedUploadsCreate. - Poll
fileStatusuntil it returns READY before referencing the file anywhere. - Attach the file to a product using
productCreateMediaorproductUpdateMedia, following the Admin GraphQL documentation. - Associate specific images with variants using
productVariantsBulkUpdate.
Your app needs write_products and media write scopes granted before any of this works. One error worth knowing in advance: MEDIA_DOES_NOT_EXIST fires when productUpdateMedia references a media ID that isn’t actually attached to that product yet, since updates only apply to media already on record. Build in a check that confirms the media ID exists before you try to update it, and you’ll save yourself a lot of failed API calls.
Should you use an app instead of coding it yourself?
If you don’t have developer resources, a Shopify SEO Automation app that handles bulk image replacement is the sensible middle ground between manual editing and building your own API integration. Most decent ones map images to products by SKU or handle, let you bulk-edit alt text at the same time, and include basic resizing tools so you’re not prepping every image by hand first.
Before running a full replace across your catalogue, check two things:
- The app’s requested access scopes. Anything asking for permissions beyond product and media access is worth questioning.
- Whether it offers a changelog or preview step before committing changes, so a mapping error doesn’t wipe out a working gallery.
Apps suit stores without a developer on staff, or anyone doing this a few times a month rather than daily. Where they fall short is complex mapping logic, custom theme sections with hard-coded image references, or catalogues where supplier data is inconsistent enough that automatic SKU matching produces the wrong pairing. In those cases, a manual pass or a custom script beats a generic app every time.
How do you map images to the right products and variants?
Get the mapping wrong and you’ll end up with the right image on the wrong product, which is worse than no image at all. The handle column is what ties an image row to a specific product in a CSV import, so double-check it matches exactly before you import anything.
- One row per image. Never stack multiple image URLs in a single cell.
- Use the Variant image URL column for variant-specific shots (colour or size variations), and match by SKU or option value rather than by name, since supplier option labels rarely match yours exactly.
- Prefer variant IDs over free-text matching when you’re automating through the API, since mismatched option names between suppliers is one of the most common causes of images landing on the wrong variant.
- Add or bulk-edit alt text during the same import pass. It’s far quicker than going back through product by product later, and it directly affects both accessibility and image search visibility.
What size and format should replacement images be?
Shopify accepts images up to 5000×5000 pixels and 25 megapixels, but you don’t need to push anywhere near that ceiling for a standard product photo. 2048×2048 pixels, or a range of 2048 to 3000 pixels on the longest side, gives you a sharp image on retina displays without an unnecessarily heavy file.
- Upload to Content > Files first. It’s the most reliable way to get a stable HTTPS link that won’t disappear if a third-party host changes its structure.
- If you’re hosting elsewhere, confirm the URL is a direct link to the image file, not a page that merely displays it.
- Strip filename suffixes like
_thumbor_v2that can confuse import validation. - Compress oversized files before uploading. A 15MB PNG straight from a supplier site rarely needs to be that large, and smaller files load faster on the storefront.
Shopify’s own limit sits at 25 megapixels per image, so anything above that fails validation outright regardless of file format.
How do you verify results and fix import errors?
Confirm success by checking the version token on the image URL. If it’s changed and the new photo loads on the actual storefront page, the replacement worked. Don’t trust the admin preview alone; load the live product page in an incognito window to rule out browser caching.
- If you see “An error occurred while trying to download the image,” the URL usually isn’t public, according to Shopify’s troubleshooting guide. Open the URL in a private browser tab; if it doesn’t load a direct image, rehost it.
- If the import flags a megapixel or file size error, resize and re-export the image, then re-import just that row.
- Remember that imports can fail silently on individual rows while the rest complete successfully, so check a sample of products after every import rather than assuming a clean run.
Pro Tip: Keep a small test batch of five products for your first import attempt. It’s far less painful to debug five rows than to discover a formatting mistake after importing five hundred.
Dropshipper checklist and the case for automating this
Before you replace anything, verify that the new image honestly represents the product: correct colour, correct accessories included, correct packaging shown. This matters more with AI-generated or heavily edited images, since a photo that looks better than what ships tends to generate returns and complaints, not sales.
- Confirm colour, included accessories, and packaging match what actually ships.
- Automate once your catalogue is large enough, or your update frequency is high enough, that manual replacement stops being realistic.
- Watch for duplicate-content risk: reusing the same supplier photos as every other store selling the same item does nothing for your search visibility.
This is precisely the gap such tools are built to close. Rather than replacing one supplier photo at a time, they generate unique product images and SEO-ready listings in bulk, then export the finished pages to Shopify in a single click, so accuracy and speed don’t have to trade off against each other.
How do you back up existing product images before replacing them?
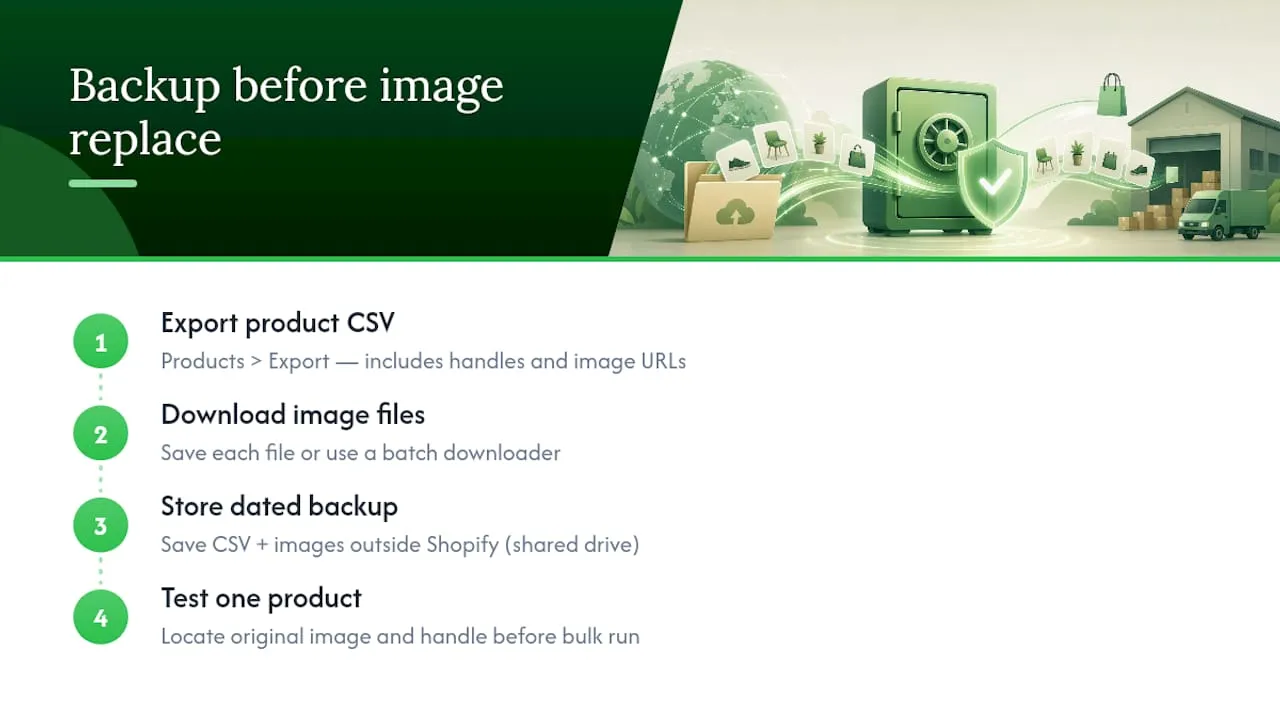
Never run a bulk replace without a fallback. If a mapping error puts the wrong image on fifty products, you want the ability to reverse it in minutes, not rebuild your catalogue from scratch.
Start with a full product export from Products > Export in your Shopify admin. This CSV captures your current image URLs, handles, and variant structure, giving you an exact record of what existed before you touched anything. Save this file somewhere outside Shopify, a shared drive or local folder works fine, and label it with the date.
Next, download the actual image files rather than relying on the CSV’s URLs alone. Shopify’s CSV export lists image URLs, but those links point to hosted files that can be affected by a subsequent replace. Right-click and save each image, or use a batch downloader against the exported URL list, so you have the actual files on hand.
If you’re working with a smaller catalogue, Content > Files also keeps a record you can reference, though it won’t protect you the same way a full offline export does. For larger stores, some merchants keep a version-controlled folder structure that mirrors their product handles, so restoring a single product’s image is a matter of finding the right folder rather than searching through hundreds of files.
Test your backup before you need it. Pick one product, confirm you can locate its original image and its handle in your backup, and only then start the actual replacement work. A backup you haven’t verified is really just a hope.
Does replacing images hurt your Shopify SEO?
Replacing an image doesn’t damage your SEO on its own, but doing it carelessly can. Google indexes images by URL, filename, and the surrounding page context, including alt text. Swap an image without touching any of that, and you risk losing whatever ranking signal the old image had built up, particularly if it had earned traffic through Google Images.
The fix is straightforward: treat alt text as part of the replacement, not an afterthought. When you update the CSV or run a Files replace, update the alt text at the same time to accurately describe the new image, including relevant product details a shopper or search engine would want to know. Skipping this step is the single most common reason a store’s image search traffic dips after a bulk update.
Filename consistency matters too, though less than alt text. Where possible, keep a similar descriptive filename structure across your replacement images rather than uploading everything as generic supplier export names like IMG_4821.jpg, which tell search engines nothing about what’s in the photo.
There’s also an upside worth stating plainly: if your current images are simply duplicates of what every competing dropshipper is using, straight from the same AliExpress listing, replacing them with unique photography or AI-generated images can actually improve your SEO standing rather than risk it. Duplicate images across competing stores are one of the quieter reasons a listing struggles to rank, and a genuinely unique image set removes that specific problem.
How do you check that a replacement actually shows on the storefront?
Checking the admin preview isn’t enough on its own, since Shopify’s admin panel can cache thumbnails differently to how the live storefront renders images. The only reliable test is loading the actual product page as a shopper would see it.
Open the live product URL in an incognito or private browser window. This bypasses your browser’s own cache and forces a fresh request, so you’re seeing exactly what a new visitor would see. Compare the image against what you uploaded, checking that it’s the correct version and not a stale copy still being served from a CDN edge node that hasn’t updated yet.
If the old image still appears, check the version token on the image URL first, the ?v=... string Shopify appends after every Files replace. A changed token with an unchanged image on-screen usually points to browser or CDN caching rather than a failed replace, and it typically resolves itself within a few minutes as Shopify’s CDN propagates the update.
For a bulk CSV import, spot-check a random sample across the batch rather than just the first few rows. Import processes occasionally skip individual rows without throwing an obvious error, so relying on the first three products looking correct can mask problems further down the file. Check products from the start, middle, and end of your import list.
If you’re running this through the Admin GraphQL API, query the product’s media field directly after your mutation completes to confirm the new media ID is actually attached, rather than trusting that the mutation returned success. A successful API response doesn’t always guarantee the storefront has caught up yet.
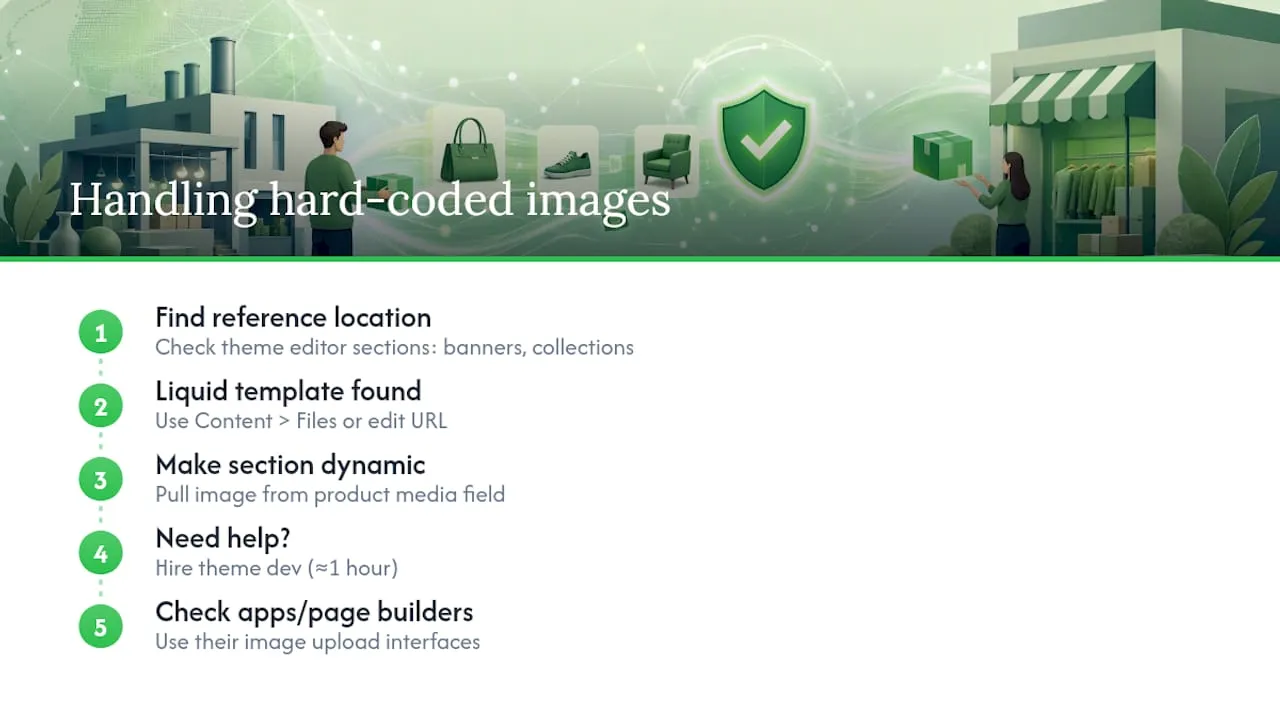
How do you handle images hard-coded into your theme?
Files replace and CSV imports both work through Shopify’s product data model, but plenty of themes reference images outside that system entirely, inside a hero banner section, a custom collection template, or a hard-coded <img> tag in a Liquid file. These won’t update through any of the standard replacement methods, because they’re not pulling from the product’s media field at all.
Start by identifying where the reference actually lives. In the theme editor, check custom sections built for banners, featured collections, or “shop the look” style blocks, since these are the most common places store owners hard-code an image URL directly rather than pulling it dynamically from product data.
If you find a hard-coded URL inside a Liquid template file (accessible under Online Store > Themes > Edit Code), you’ll need to either replace the referenced file through Content > Files, which works if the theme is pointing to a Shopify-hosted file, or edit the code directly to point to a new URL if it’s referencing an external host.
The safer long-term fix is switching these sections to pull from a product’s dynamic image field rather than a fixed URL wherever your theme supports it. This means future replacements flow through automatically the next time you swap the underlying file, rather than requiring a code edit every time. If you’re not comfortable editing Liquid directly, most theme developers can make this change in under an hour, and it saves considerable hassle on every future image update.
Custom sections built with theme apps or page builders usually have their own image upload interface separate from product media entirely, so check those interfaces directly rather than assuming a product-level change will cascade through.
Author perspective: what actually matters when you’re changing images at scale
Accuracy comes before speed. Get the product representation right first, then worry about standardising sizes and alt text across the batch. Automate only once you’ve mapped a sample manually and confirmed it works, and always keep the originals somewhere before you overwrite anything. If an image gets reused across several products, Shopify Files as your single source of truth saves you from replacing the same photo five separate times.
*— Koen
Replace supplier photos at scale without the manual grind
Every method above works, but they all cost time: exporting CSVs, checking version tokens, chasing down hard-coded theme references. Some tools remove that entirely by generating a full set of unique, SEO-ready product pages, images included, straight from an AliExpress, Amazon, Temu, or competitor Shopify link, then exporting the finished result to your store in one click.
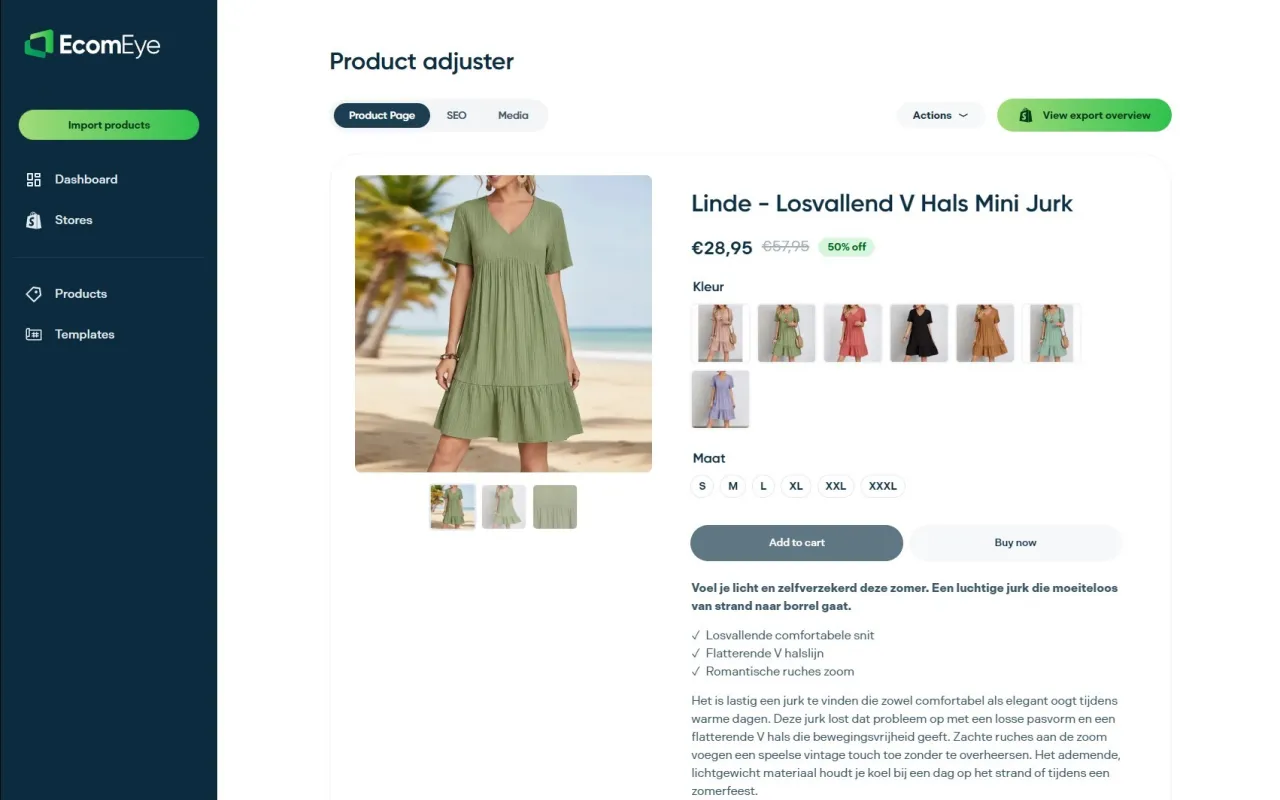
That matters most if you’re running a large catalogue, adding new products weekly, or currently reusing the same supplier photos every other dropshipper selling that item already uses, which is one of the quieter causes of Google Merchant disapprovals and flat search rankings. Ecom-eye’s AI product image generator produces a distinct image set per store, even when the underlying product listing is identical to a competitor’s, so you’re not fighting duplicate-content problems on top of everything else.
Pricing runs on two plans: Try-out at €39 per month and Scaler at €99 per month, both listed on the pricing page. Start a trial there and run your next catalogue update through it rather than another weekend of manual CSV edits.
FAQ
How do I replace an image on Shopify?
For a single image, go to Content > Files, find the file, and click Replace, then upload the new version. Shopify assigns a new version token automatically, though hard-coded theme references may need updating separately. For many images at once, use a CSV import with public HTTPS URLs instead.
How do I remove product images from Shopify?
Open the product in your admin, hover over the image in the Media section, and select the delete or remove option that appears. For bulk removal across many products, edit your product CSV export to clear the image URL columns for the relevant rows, then re-import with matching handles.
How to replace a logo in Shopify?
Go to Online Store > Themes > Customize, find the header section, and upload a new logo file directly through the theme editor rather than through Content > Files. Most themes store the logo reference separately from product media, so this is handled through theme settings rather than a product image replacement.
Does Kim Kardashian use Shopify?
Skims, the shapewear and clothing brand founded by Kim Kardashian, is publicly known to run on the Shopify platform. It’s frequently cited as one of the platform’s higher-profile storefronts, though it isn’t directly relevant to how a smaller catalogue handles supplier image replacement.
What’s the fastest way to replace hundreds of supplier images at once?
A CSV import with the overwrite option handles hundreds of images in one pass, provided every image sits at a public HTTPS URL first. For ongoing, repeated bulk updates, tools that automate the process, including Ecom-eye’s bulk image and page generation, remove the manual CSV work entirely.
Ready to boost your product pages?
Generate high-converting, SEO-optimized product pages in bulk using AI automation used by e-commerce experts.
No credit card required