Size Chart Mapping in Shopify: Match Each Product to Its Chart
Learn how to map size charts to Shopify products with page metafields, assign them in bulk, show them on product pages and format them for US shoppers.

Size Chart Mapping in Shopify: Match Each Product to Its Chart

Size chart mapping means each product shows the chart that fits it, not one generic table for the whole catalogue. In Shopify you do this without an app. Build each chart as a page, create a product metafield that references a page, assign the right page to each product, then connect that metafield to your theme. For a large catalogue, you fill the metafield in bulk with the bulk editor or a CSV file.
This guide walks through the native method step by step, shows how to assign charts at scale, and covers how to format charts for US shoppers. It also covers a dropshipping problem that catches many stores: supplier charts in centimetres and Asian sizing labels.
TL;DR
- Create one page per size chart, then a product metafield of the “Page” reference type, and assign a page to each product.
- Connect the metafield to a Pop-up block or your theme’s size chart setting through the dynamic source icon in the theme editor.
- For many products, edit the metafield in Shopify’s bulk editor or through CSV columns, instead of opening each product.
- For US shoppers, lead with US sizes, show inches and centimetres, and say whether the figures are body or garment measurements.
- If a chart is missing or wrong, check the product template and the page assigned in the metafield first.
Table of Contents
- What size chart mapping actually means
- Step 1: Build one page per size chart
- Step 2: Create the metafield definition
- Step 3: Assign the right chart to each product
- Step 4: Show the chart on the product page
- Assigning size charts in bulk
- A note on category metafields
- Formatting charts for US shoppers
- The dropshipping problem: supplier charts
- Prepare the whole product page together
- When a size chart is missing or wrong
- A short launch checklist
- FAQ
- Sources
What size chart mapping actually means
A store selling only one type of garment can get away with one chart. Most stores cannot. Women’s tops, men’s trousers, trainers, kids’ clothing and rings each need their own table, and a shopper who opens the wrong chart usually orders the wrong size.
Mapping is the link between a product and its chart. There are three common ways to build it:
- Paste a table into each description. Simple, but you edit every product by hand when a chart changes.
- Link to a shared page. One chart, many products. Fine when every product uses the same sizes.
- Reference a chart page through a metafield. Each product points to its own chart, and one edit to a page updates every product that uses it.
The third option is the one this guide focuses on. Shopify’s own help centre describes it: you create a page with the sizing table, define a product metafield with the “Page” reference type, and assign the page to specific products in the metafields section of the product editor (Shopify Help Center).
Step 1: Build one page per size chart
Start by deciding how many distinct charts you need. Do not make one per product. Make one per sizing logic. A typical apparel store might need:
- Women’s tops and dresses
- Women’s bottoms
- Men’s tops
- Men’s bottoms
- Footwear (men’s, women’s, kids’)
- Kids’ clothing by age
- Accessories such as belts or gloves
Then, in your Shopify admin, go to Online Store > Pages and add a page for each. The page content holds the table and any “how to measure” instructions. Give pages clear internal names, such as “Size chart: Women’s tops”, because you will pick them from a list later and similar names cause mistakes.
Keep the chart itself plain: a real table, not an image. A table is readable on mobile, searchable and easy to edit. An image of a chart cannot be updated in one place without re-exporting it.
Step 2: Create the metafield definition
The metafield is the connector. In your admin, open Settings > Custom data > Products and add a definition. Name it something obvious like “Size chart” and choose the “Page” reference type. Shopify’s tutorial for pop-up size charts uses exactly this setup (Shopify Help Center).
Two choices here save trouble later:
- Keep the key predictable. If you plan to fill the metafield from a CSV file, the key appears in the column name, so something short and lowercase works best.
- Do not create several size chart metafields. One metafield with many possible pages is easier to manage than “size chart tops”, “size chart shoes” and so on.
Step 3: Assign the right chart to each product
Open a product, scroll to the metafields section, and choose the chart page from the list. Save. That is the whole mapping for one product. A theme builder’s documentation describes the same logic: you map different charts by assigning different pages to different products in their metafield settings, and the theme editor connects the right page to each product template through dynamic sources (Maestrooo theme documentation).
A few practical rules:
- Assign by product type first, then handle exceptions. A brand’s slim-fit shirts may need their own chart even though they sit in the same collection as regular shirts.
- Never reuse a chart across brands whose sizing differs. If you resell items from different suppliers, the supplier’s own sizing logic matters more than the category.
- Test the first product from every chart before you map the rest.
Step 4: Show the chart on the product page
The metafield holds the data. Your theme still has to display it. In the theme editor, open a product template and add a Pop-up block, then connect its Page setting to the size chart metafield with the dynamic source icon. Shopify’s tutorial walks through this (Shopify Help Center).
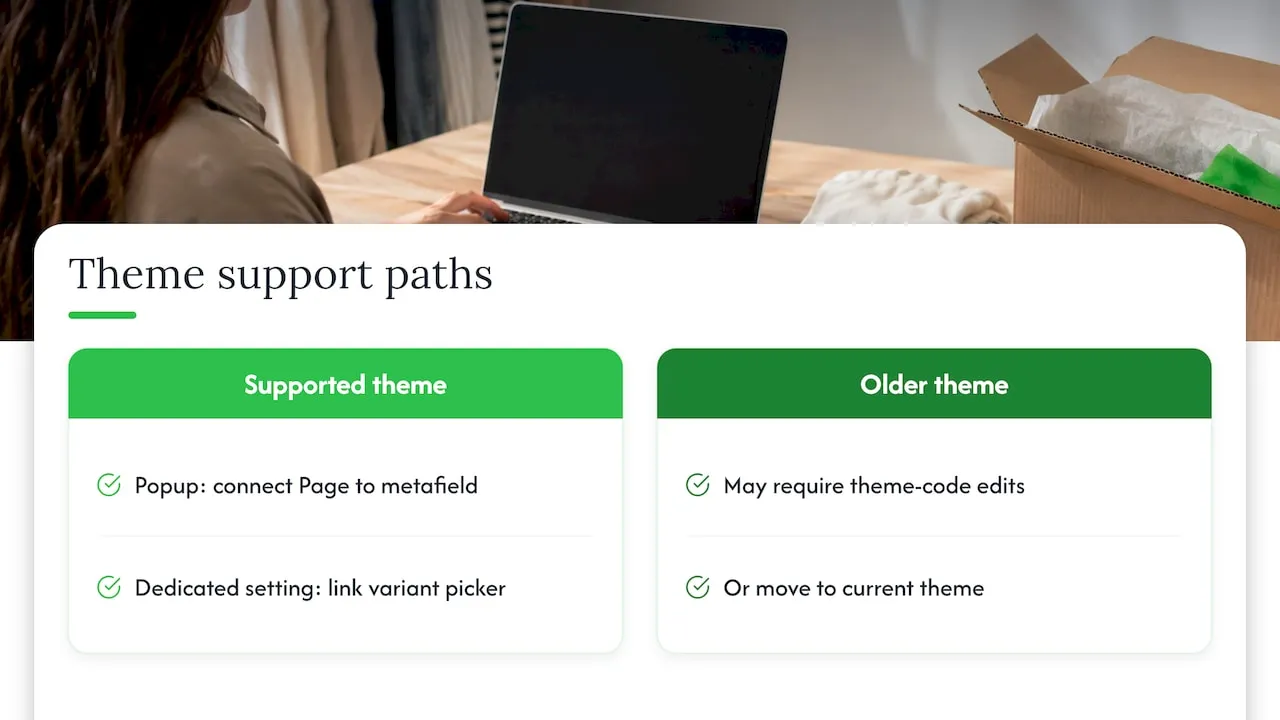
Some themes ship with a dedicated size chart setting. In the theme documentation we found, you connect the Size chart setting in the variant picker block to the metafield (Maestrooo theme documentation). Dynamic sources work because theme block settings can pull from resources such as products, collections, pages, metafields and metaobjects (Shopify developer documentation).
If your theme is older, it may not support connecting metafields in the editor. Shopify notes that vintage themes or unsupported metafield types might need theme code edits (Shopify Help Center). In that case, either move to a current theme or get a developer to add the output to the product template.
Placement matters as much as mapping. Baymard’s apparel research lists a size guide link near the size selector among the parts of an effective size guide (Baymard Institute). Put the link right above or beside the size picker, not buried in the description.
Assigning size charts in bulk
Opening every product is fine for twenty items. It is not fine for two thousand. You have two native routes.
The bulk editor
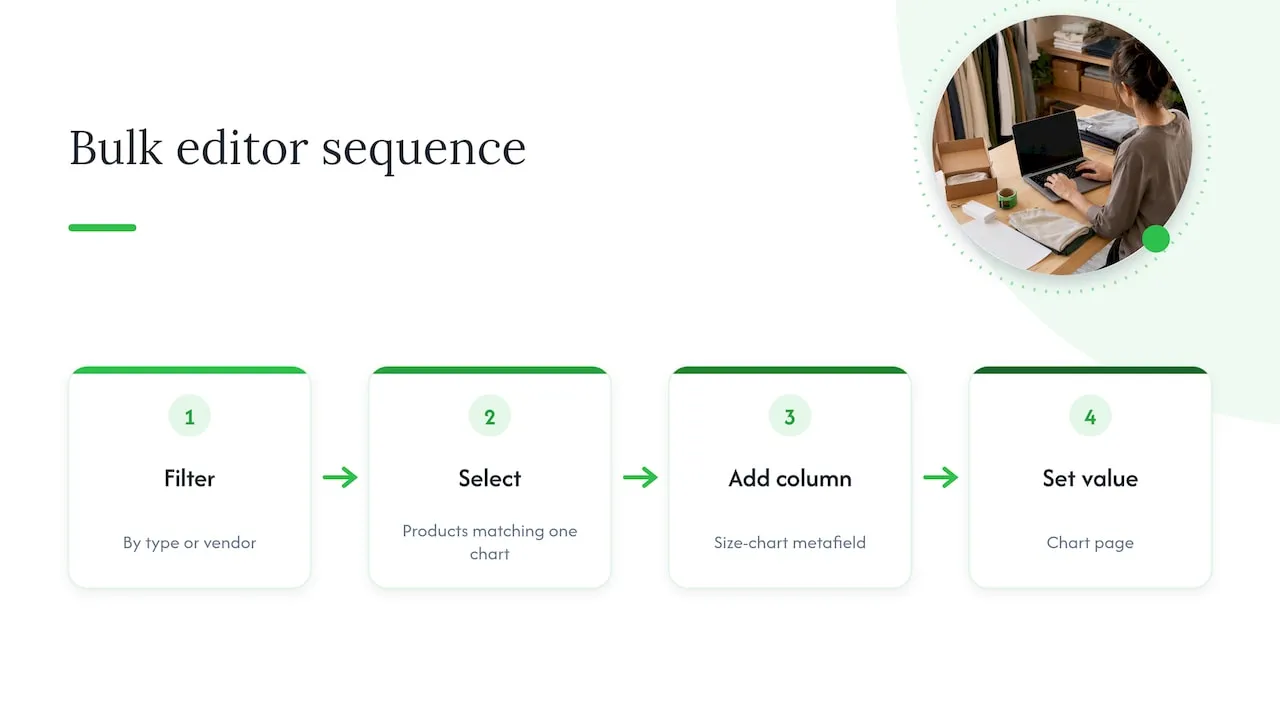
Shopify’s bulk editor lets you edit metafield values across many products at once. Theme documentation recommends it for assigning the same size chart page to multiple products: select the products, add the size chart metafield as a column, and set the value (Maestrooo theme documentation). Filter the product list by type or vendor first so that the selection matches one chart.
CSV import
Product metafields can be imported and exported with CSV files for supported metafield types, and the product CSV carries metafield columns formatted as product.metafields.custom.KEY or as a name followed by the key in brackets (Shopify Help Center). The workflow:
- Export your products to CSV.
- Add or fill the size chart metafield column.
- Use your product type or tag column to decide which chart each row gets.
- Re-import, overwriting existing products, and spot-check one product per chart.
Before a large re-import, back up the original export. A wrong column can overwrite more than you intended. Our guide to bulk editing product pages covers a safe order of operations, and the one on bulk find and replace in Shopify helps when a chart name or a unit label has to change across the catalogue.
Fallback rules by type or tag
Some stores add a small Liquid snippet so that a default chart appears by product type or tag when no metafield is set. That gives every product a chart even if you forgot to map one. It needs a developer or a comfortable hand with theme code, so treat it as a safety net, not the main system.
A note on category metafields
Shopify’s category metafields use metaobjects and metaobject entries for values such as size and fabric, and they can be used in an online store theme. Shopify says this can make product information more discoverable across your site, marketplaces and search engines (Shopify Help Center). These are different from your chart page reference: category metafields describe the size of a variant (for example “M”), while the chart page explains what “M” means. Fill in both where you can.
Our view on mapping at scale
We build EcomEye for dropshippers who list hundreds of products from AliExpress, Amazon, Temu or competitor Shopify stores. In that workflow the size chart is where most stores quietly lose quality. The supplier’s table arrives in centimetres, with labels that do not match what a US shopper expects, and it is often identical to the table on ten other stores.
That is why we treat the size chart as part of the product page, not an afterthought. Our platform generates unique, SEO-optimised titles and descriptions for every listing, includes size system conversion and built-in bulk editing, and exports to Shopify in one click. The aim is that the chart data and the page copy are prepared together, so you are not rebuilding sizing by hand after the import.
Our advice: decide your chart logic first, convert units once, and map by type. Then let the tooling do the repetitive work.
Koen
Formatting charts for US shoppers
Mapping gets the right table onto the page. Whether shoppers trust it depends on what is in it. The research is consistent on a few points.
Lead with US sizes. Nielsen Norman Group advises that localised sites show local sizes by default: for US shoppers, show the US size prominently and keep the original brand or label size as a cross-reference (Nielsen Norman Group). Amazon’s US seller guidance says the same in its own terms: the local size is the size the customer selects, and if the item’s label uses another system, you show that label size alongside the corresponding dimensions (Amazon Seller Central).
Show inches and centimetres. Baymard recommends both, because shoppers may prefer either and may not know the conversion (Baymard Institute). For a US store, list inches first.
Say what you measured. Shopify’s sizing chart guide advises that US-focused charts state whether the figures are body or garment dimensions, to reduce confusion and returns (Shopify). Nielsen Norman Group adds that if you give product measurements, you should give them for all sizes and explain how they were taken (Nielsen Norman Group).
Use clear labels. Shopify’s guide recommends clear measurements and size labels such as XS to XXL, and mapping core sizes to global standards if you sell internationally (Shopify).
Put together, a mapped chart for a women’s top might look like this. The figures are an illustration of the layout, not a standard to copy; use your own supplier’s verified measurements.
| US size | Label size (supplier) | Bust (in / cm) | Waist (in / cm) | Garment length (in / cm) |
|---|---|---|---|---|
| S | M | 34 / 86 | 27 / 69 | 24 / 61 |
| M | L | 36 / 91 | 29 / 74 | 25 / 63.5 |
| L | XL | 38 / 97 | 31 / 79 | 26 / 66 |
Note the order: the US size is the one in the first column and the one shoppers pick in the variant selector. The supplier label sits beside it as a cross-reference. Add a line under the table saying whether the figures are garment or body measurements, and a short instruction on how to measure.
Baymard also lists measurement instructions and product-type relevance among the elements of an effective apparel size guide (Baymard Institute). This is the argument for mapping: a shoe chart on a jacket page is noise, and it costs trust.
The dropshipping problem: supplier charts
If you import products from marketplaces or competitor stores, the chart you receive has three typical faults:
- Wrong units. Centimetres only, or inches rounded in odd ways.
- Wrong sizing system. Asian labels that run one or two sizes smaller than US labels, and no cross-reference.
- Duplicated content. The same table, word for word, on every store selling the item.
The fix is a process, not a tool. Our guide to Shopify size conversion for dropshippers breaks it into measurement steps, and the article on Shopify measurement units explains how weight and dimensions are handled in the store settings so that your shipping data and your chart data do not contradict each other.
A workable routine:
- Group imported products by sizing logic, not by supplier.
- Convert each group’s chart once, to US sizes with inches and centimetres.
- Check one physical or manufacturer-confirmed measurement per group.
- Create the chart page, then map the group in bulk.
- Keep the supplier’s label size in a separate column.
Step 3 matters. A converted table is only as accurate as its source. If a supplier’s figures are wrong, a perfectly mapped chart will give shoppers confident, wrong advice.
If you are importing competitor listings, read how to do it safely in our guide to importing competitor products into Shopify. If your store is multilingual, chart pages need translating along with products; see our piece on bulk translating Shopify for catalogue-scale approaches.
Prepare the whole product page together
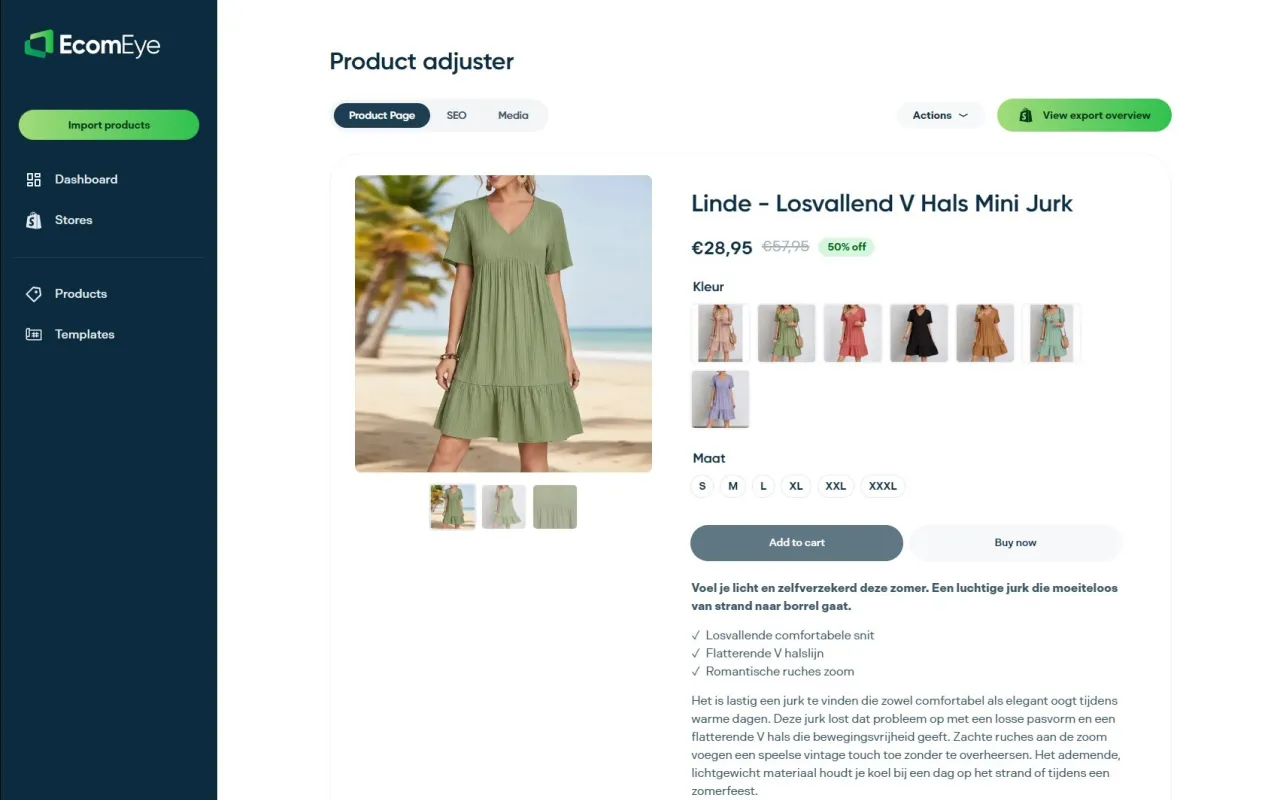
Size charts sit inside a page that also needs a unique description and consistent images. If you are building listings at volume, we built EcomEye to handle that stage. You import products in bulk from AliExpress, Amazon, Temu or competitor links, generate unique titles and descriptions with our AI product description generator, create images with the AI product image generator, convert size systems, edit in bulk, and export to Shopify in one click.
Plans start with Try-out at €39 per month, and Scaler is €99 per month. You can compare them on the EcomEye pricing page, where new users can also see the current trial terms.
When a size chart is missing or wrong
Most problems come from a short list of causes. Work through it in order:
- Is the metafield filled in? Open the product and check the size chart field has a page assigned. An empty field shows nothing.
- Does the product use the right template? A chart block added to one product template does not appear on products that use another. Check which template the product uses and confirm the block is on it.
- Is the block connected to the metafield? In the theme editor, confirm the Page setting is linked through the dynamic source icon, not left on a fixed page.
- Is the page published? An unpublished or deleted page leaves the pop-up empty.
- Is the metafield type supported by your theme? Shopify notes that unsupported types or vintage themes may require code changes (Shopify Help Center).
- Did a bulk edit or import overwrite values? Compare against your backup export.
If the chart shows but the data is wrong, edit the page, not the product. That is the benefit of mapping: one correction updates every product pointing at that page.
A short launch checklist
- One page per sizing logic, named clearly
- One “Page” reference metafield for products
- Each chart: US size first, supplier label as a cross-reference, inches and centimetres
- A line stating body or garment measurements, and how to measure
- Size guide link next to the size selector
- Bulk assignment done by type, with one spot check per chart
- Backup of the product export before every re-import
If you also want product images to stay consistent across the catalogue, see our guide to CSV bulk product image generation, and for accessibility and search, the one on bulk editing alt text.
FAQ
Do I need an app to map size charts in Shopify?
No. Shopify’s native route works: create a page per chart, add a product metafield with the Page reference type, assign pages to products, and connect the metafield to your theme in the editor. Apps add convenience, but the native method covers the mapping itself.
How do I assign a size chart to many products at once?
Use the bulk editor to add the size chart metafield as a column and set the same page for the selected products. For very large catalogues, fill the metafield column in a product CSV and re-import. Filter by product type first so each batch matches one chart.
Should size charts show inches or centimetres?
Both. Baymard’s research recommends giving inches and centimetres because shoppers may prefer either and may not know the conversion. For a US store, put inches first and the US size in the leading column.
Why does my size chart not appear on some products?
Usually the metafield is empty, or the product uses a template that does not have the chart block. Check the assigned page, the template, the dynamic source connection and whether the page is published.
Can I reuse one chart for different brands?
Only if their sizing really is the same. Different suppliers often run different fits under the same label, so give each sizing logic its own page and map by type or vendor.
Sources
- Shopify Help Center: Adding a pop-up size chart to your online store
- Shopify Help Center: Metafields
- Shopify Help Center: Displaying metafields on your online store
- Shopify Help Center: Importing and exporting products with CSV files
- Shopify developer documentation: Dynamic sources
- Maestrooo theme documentation: Size chart
- Baymard Institute: Apparel, 10 best practices on sizing
- Nielsen Norman Group: Size guides and product measurements for international shoppers
- Amazon Seller Central: Information to include in your size chart
- Shopify: Sizing charts, how to make a size chart
Ready to boost your product pages?
Generate high-converting, SEO-optimized product pages in bulk using AI automation used by e-commerce experts.
No credit card required